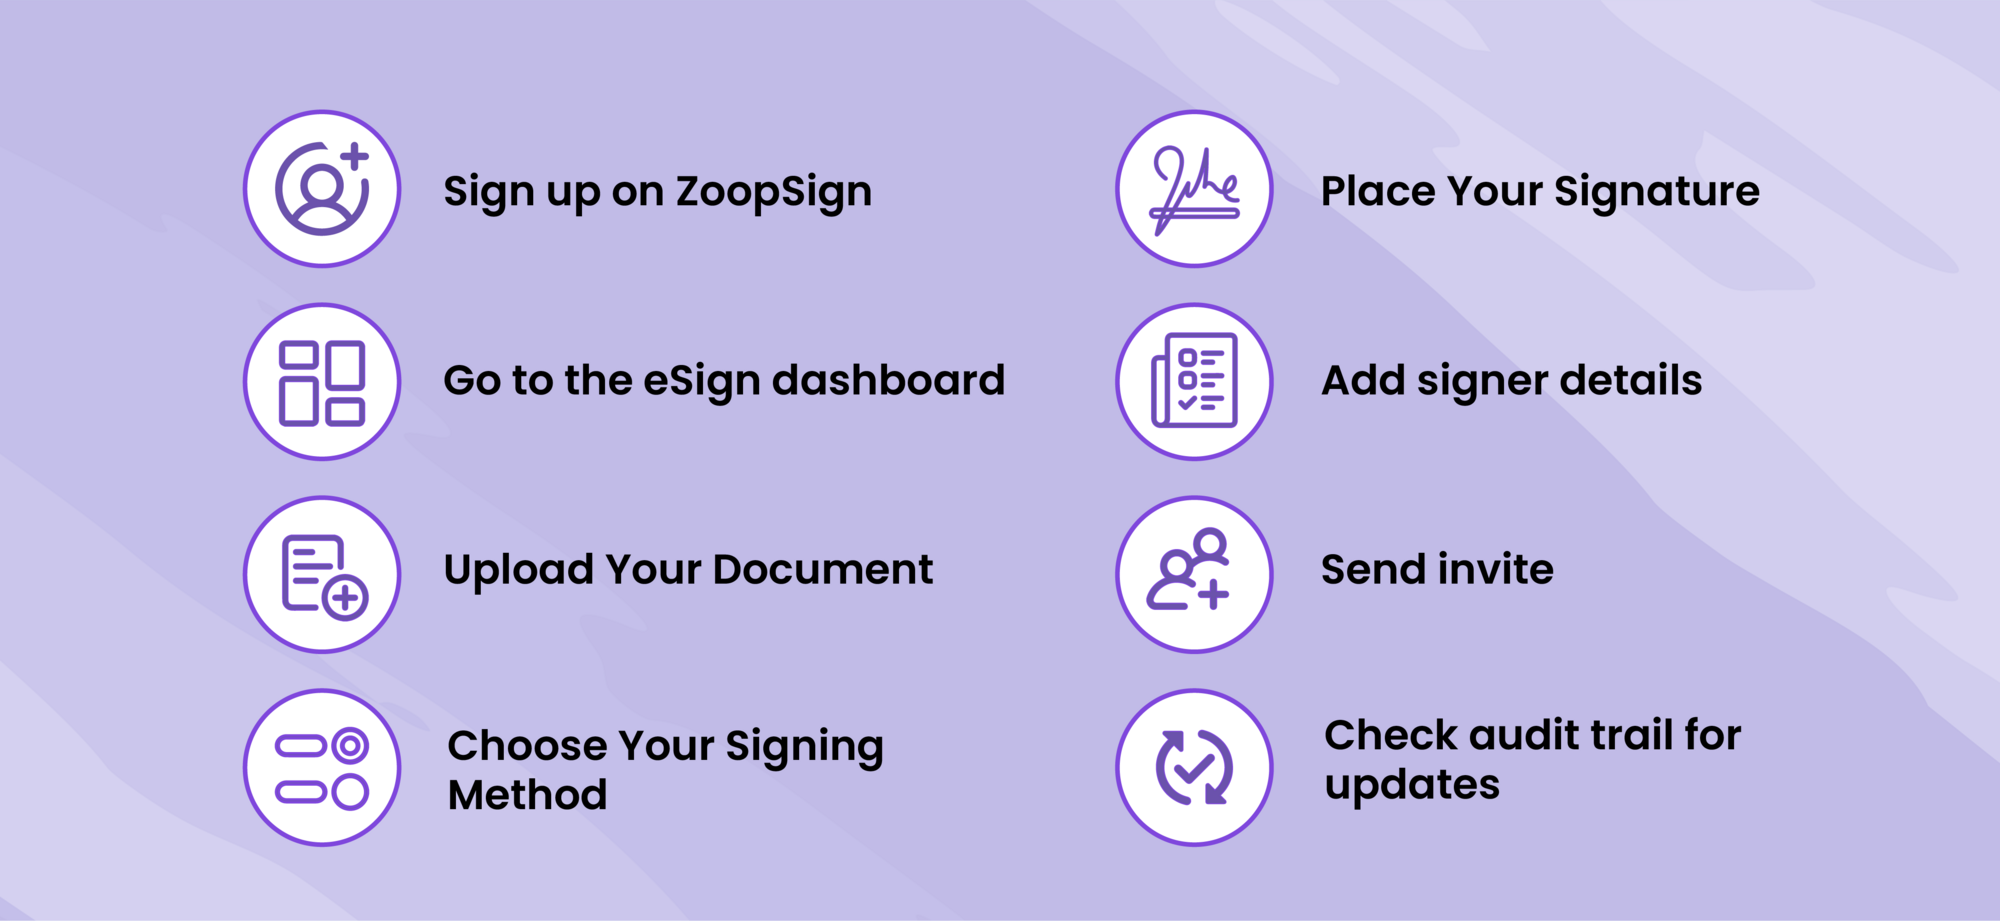
You're at the right place if you’ve signed up for ZoopSign or are just browsing for eSignatures. Let’s walk you through the user journey for eSign and show you how to get those documents signed in a snap.
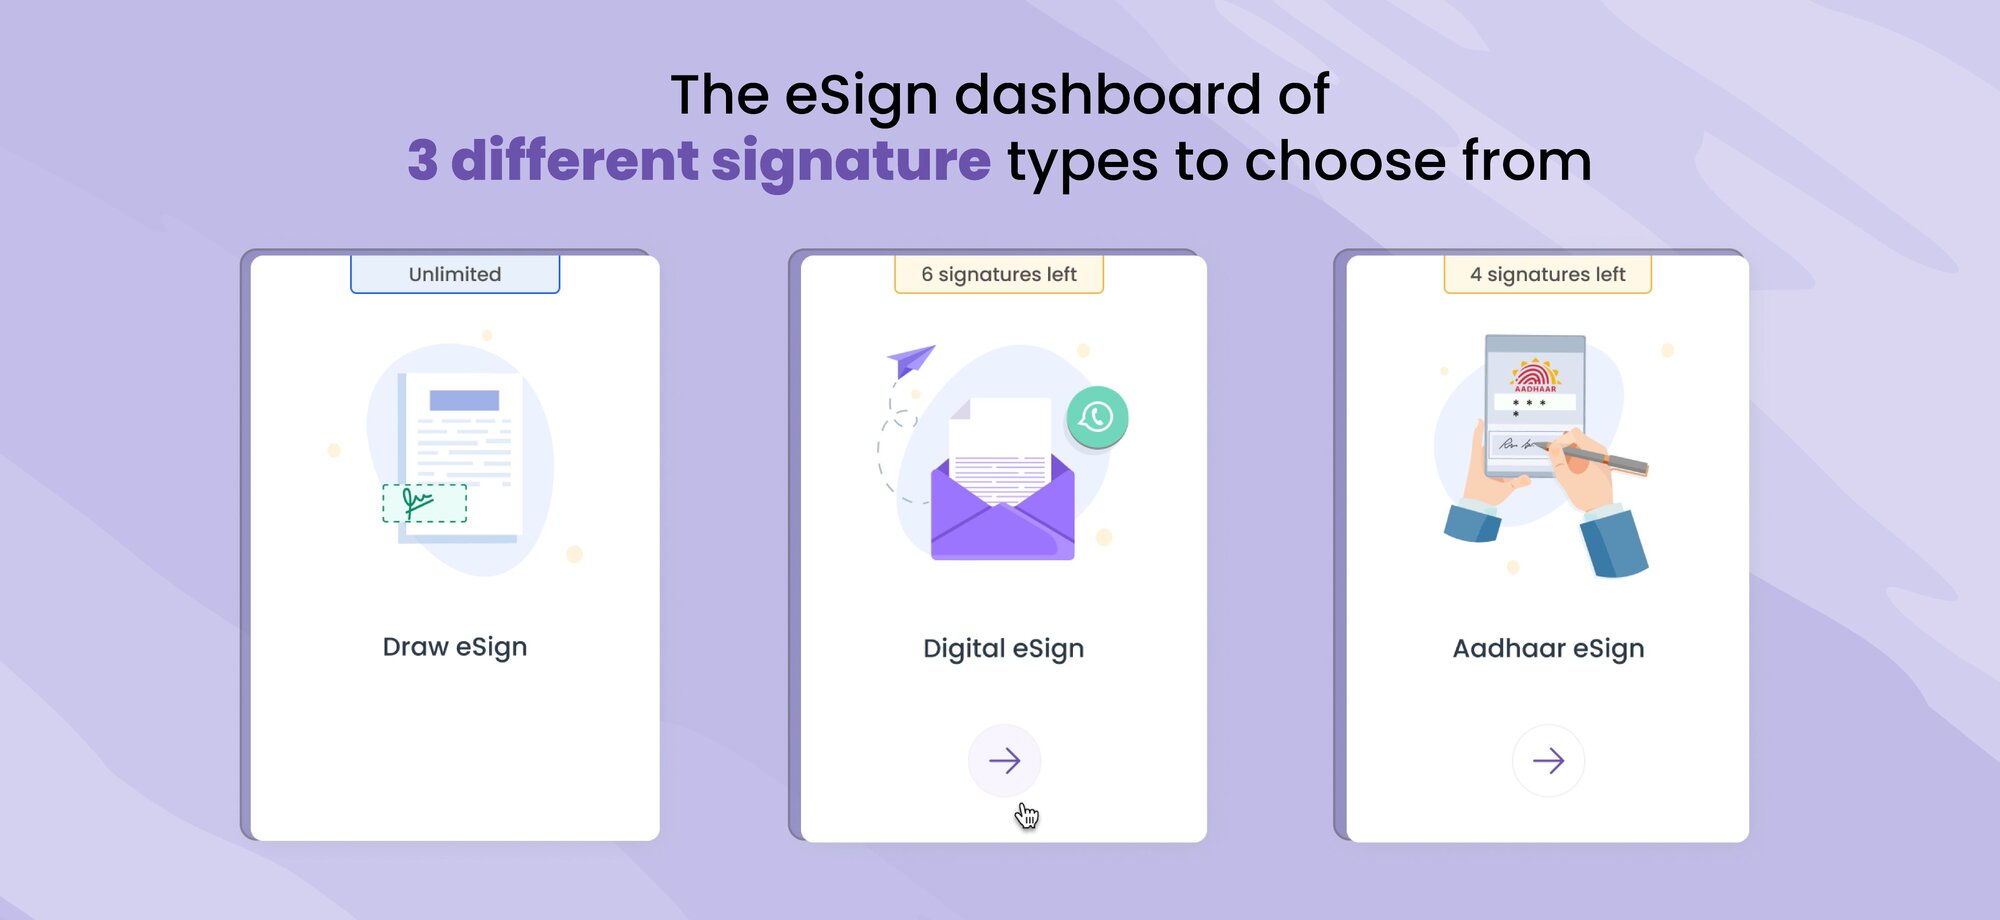
Choosing your sign type
Once you click "eSign" on your dashboard, the real eSign journey begins. Here, you'll pick your signing method from three options:
Draw eSign
- Perfect for adding a handwritten touch.
- Upload your document (or grab it from Dropbox, Google Drive, or OneDrive) and get ready to sign!
- You can customize your signature by writing, drawing, or uploading an image. Plus, you can change its placement and choose from different fonts.
- Once you're happy, insert it on the document – your self-attested document is ready!
Digital eSign
- This option lets you send documents to others for signing.
- Upload your document and fill in the signer details.
- You can also add yourself as a signer, and include multiple recipients by entering their information.
- Control the signing order and set an expiry date for the document.
- Once everything is set, send the invite!
- ZoopSign even lets you send the document via WhatsApp or by copying the link and attaching it to an email.
Aadhaar eSign (India documents only)
- This method utilizes India's Aadhaar identification system for secure signing.
- Upload your document, fill in the signer details, and set the signing order and expiry date.
- When you send the invite, it goes directly to the recipient's email.
- They'll need a one-time passcode sent to their registered Aadhaar number to access and sign the document.
- Once signed, the document returns to you, completing your eSign journey!
What Happens Next?
No matter which signing method you choose, once the document is signed, you can store it securely on ZoopSign's zDrive or take further action.
So, there you have it! With ZoopSign, eSigning is a breeze. Choose your method, customize your signature, and get those documents signed efficiently. Now get out there and start signing!